Featured on BearingNet.
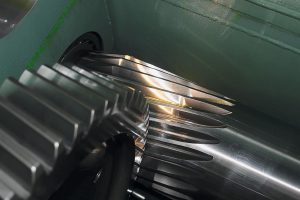
When selecting a bearing supplier for industrial machinery, one typically needs more than just a bearing. In fact, what one really needsis a three-tiered serviceconsisting of application engineering, the bearing itself, and preventative maintenance services such as diagnostics and condition monitoring. Operators of industrial plants such as steel mills and tire factories in particularly on these services when working with the premium manufacturers.They appreciate their advice before buying and know they are in good hands if a problem were to arise.In collaboration with competent engineering companies, however, independent bearing distributors can meet or even outperform this level of customer service. The strength of bearing distributors is finding cost-efficient and reliable solutions while after-sales-services like preventive maintenance can generate further profitable business.
Download the entire article “Preventive Maintenance as an After Sales Service” as a PDF.
Find more articles here.
When selecting a bearing supplier for industrial machinery, one typically needs more than just a bearing. In fact, what one really needs is a three-tiered service consisting of application engineering, the bearing itself, and preventative maintenance services such as diagnostics and condition monitoring.
Firstly, application engineering refers to the correct choice of bearing based on information about the duty cycle, which typically provides load and speed data, the appropriate lubrication, and maintenance intervals, among others. One of the main challenges is properly understanding the application since customers are often not fully aware of all the relevant details. What the customer needs and expects is that the bearing manufacturer be able to suggest the appropriate part, based on the load, speed, and space, that will endure through the machine’s intended life.
Secondly, the bearing itself must be high quality in order to ensure its reliability throughout its intended service life. The absolute highest quality available on the market can significantly outperform any life expectation based on the usual lifetime calculations according to the relevant standards. Hence, what the customer really needs is not the best possible quality, but rather sufficiently good quality at a reasonable price. Providing such products is the great strength of independent bearing distributors who work with different manufacturers. Anyone can buy products from the premium brands, but independent distributors can provide cost-efficient solutions by relying on a flexible supplier base.
Thirdly, preventative maintenance addresses the question of what happens when a particular bearing arrangement is affected by premature failures. Such failures can be traced back to any number of sources – the bearing itself can certain be the cause, but lubrication and installation issues or missing information about the application conditions can also be to blame. A thorough investigation of the specific situation and fully understanding the details of the application are essential for solving these problems. It follows that industrial customers such as steel mills, tire factories, oil drilling rigs, etc., who simply need reliable equipment want a supplier who can understand their application and assist during the design of the bearing arrangement, provide a quality product, and help if problems arise.
Typically, premium bearing manufacturers are strong in all three stages of service, but expensive. Bearing distributors can be quite strong in the second stage since they are able to find cost-efficient solutions for particular applications. However, they generally face limitations in stages one and three, application engineering and preventative maintenance (including troubleshooting).
Accordingly, a collaboration with an experienced engineering company able to provide the first and third stages of service with at least the same degree of competency as the major bearing manufacturers raises bearing distributors to a significantly higher level of service. On the preventative maintenance side, this arrangement has a distinct advantage for the customer. Since major brands do not service each other, if a gearbox uses bearings from three different companies, three different technicians would be needed to monitor the condition of the bearings. In contrast, an independent engineering company would cover all bearings in the gearbox and provide an unbiased opinion on their condition.
The industrial gearboxes used in factories are relied upon to operate continuously, often under demanding conditions. Unexpected breakdowns have a significant commercial impact due not only to the expense involved in repairing the machines but also the lost production. If damage is detected in its early stages, the necessary maintenance can be scheduled in advance. This allows production to be shifted appropriately and reduces both downtime and the cost of the repair.
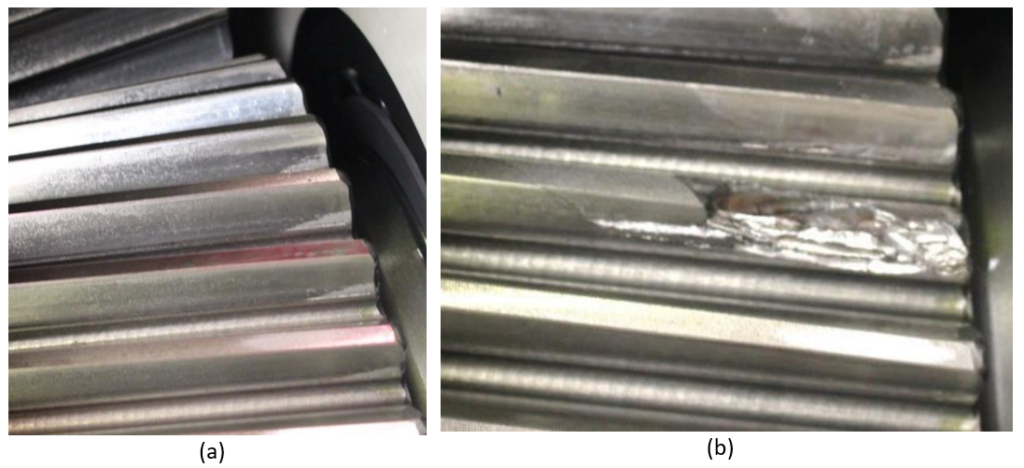
Wear on teeth is a common example of early stage damage on gears (Figure 1 (a)); left undetected, more catastrophic damage such as a tooth fracture may occur (Figure 1 (b)). If caught early, the gearbox can continue to be operated and only the effected gear stage needs to be replaced; if allowed to propagate, not only will the gearbox be inoperable, but debris from the fracture may damage other stages and the bearings, all of which will need to be replaced.
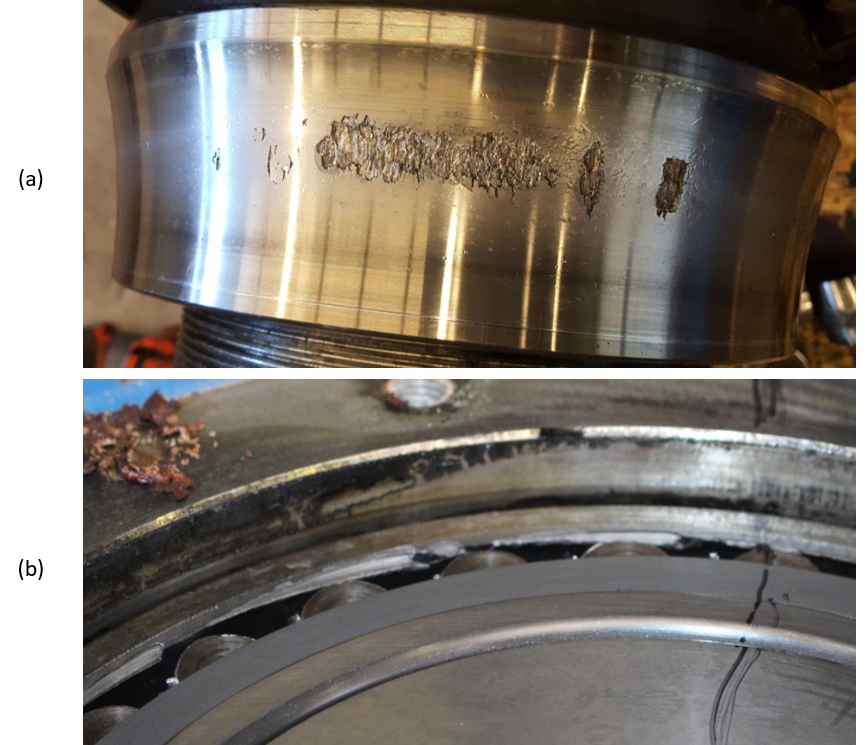
Similarly, bearings with early-stage damage such as spalling (Figure 2 (a)) do need to be replaced but are still functional and keep the shaft properly aligned. However, if the spalling propagates around the entire circumference (Figure 2 (b)), the ring may fracture resulting in a displaced shaft with subsequent damage to the gearing and the entire gearbox will be rendered inoperable.
There are three methods for detecting damages in industrial gearboxes: oil sample analysis, inspections with endoscopy, and vibration measurement. All three methods have different strengths and weaknesses and play complementary roles in effective condition monitoring.
Routine analysis of oil samples is one of the simplest and cheapest methods for monitoring the condition of gearboxes. Especially when a gearbox is easily accessible, a sample can be taken in a matter of minutes with minimal impact on operation. The analysis will yield important information about the concentration of various wear particles, contamination, viscosity, and the level of degradation. If any quantities are abnormal – increased particulates, contamination or marked degradation, for example – the oil will no longer be functioning as intended and an oil change should be scheduled to ensure sufficient and correct lubrication.
If analyses are performed on a regular basis and at sufficiently short intervals, trends may be identifiable. When looking for damages, the concentration of wear particles is particularly informative. Most types of damage will leave traces in the oil before they become visually apparent. An increasing concentration of wear particles indicates a developing problem, while the type of particle can help narrow down the source.
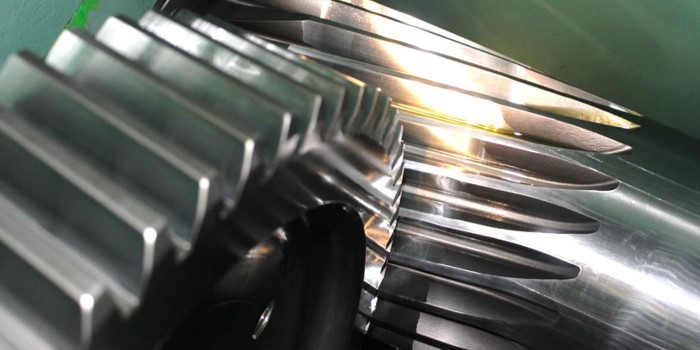
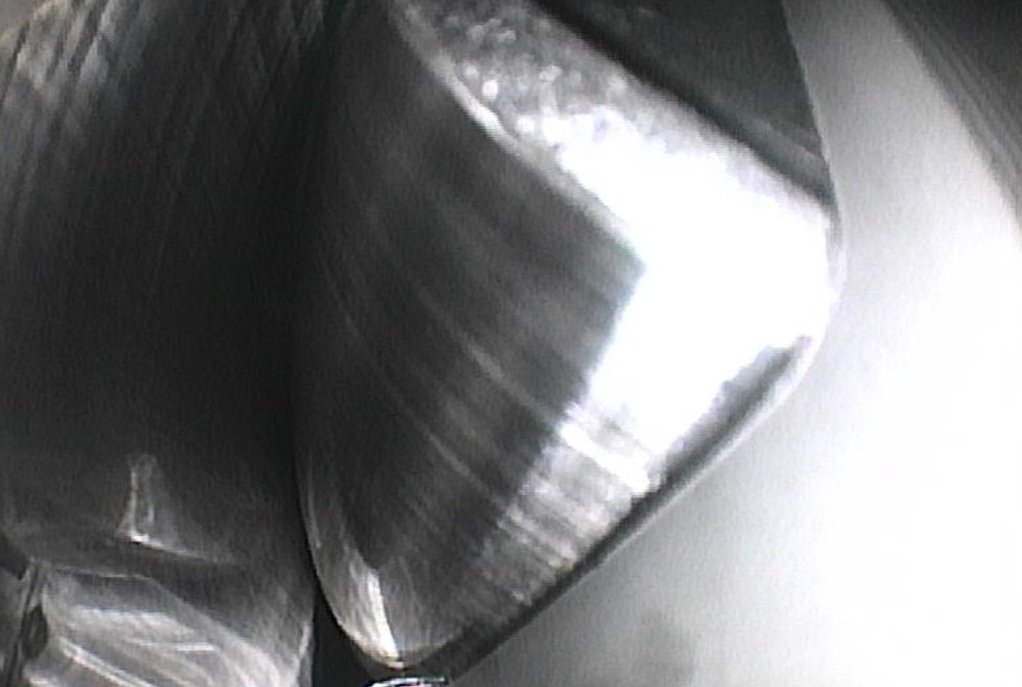
When paired with endoscopy, routine gearbox inspections are an excellent way of visually assessing the gearing and bearings. Although the degree of access is determined by the size and location of the inspection covers, if the input shaft can be turned manually, it is generally possible to individually inspect each tooth of every gear (Figure 3). In conjunction, the contact pattern of the gear stages may be analyzed by applying a special dye and running the gearbox for a short period of time.
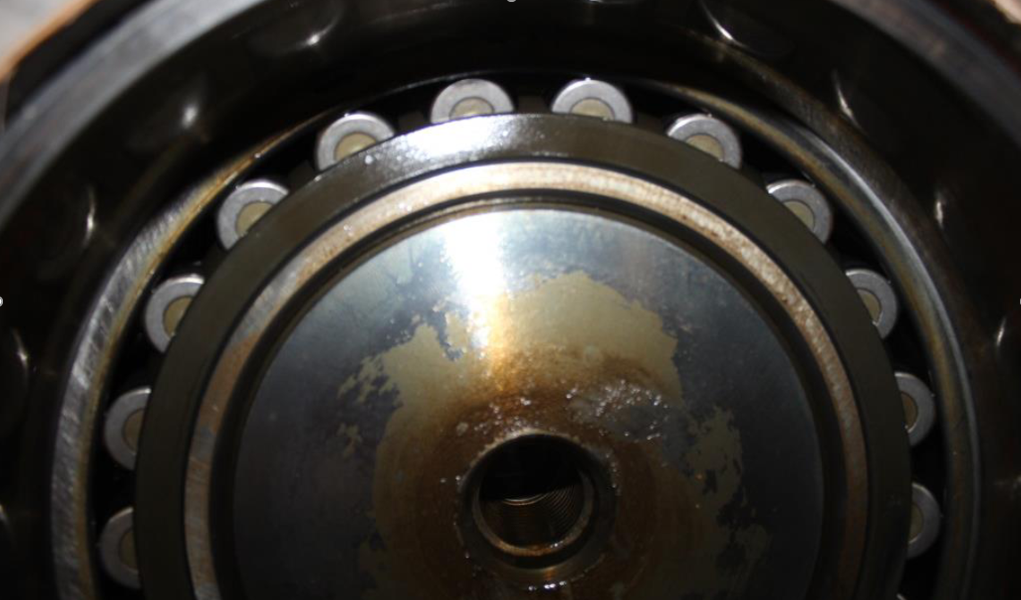
Options for inspecting the bearings are more limited, especially if they have two rows of rollers (e.g. spherical roller bearings). The outer rows may be accessed by removing the outer covers (Figure 4), but the interior row can usually only be reached by endoscope. Although endoscope’s resolution is not as high as common digital cameras, its ability to access hard to reach areas is indispensable. It is generally not possible to inspect the entirety of the raceways or all of the rollers; fortunately, this is not necessary. Even if the source of damage is not observed directly (Figure 5), if flaking has begun anywhere in the bearing, wear will be visible throughout due to metal particles getting between the rollers and the raceways.
Inspections are straight-forward, but they are not without their risks. When conducting a gearbox inspection, there is always a danger of environmental contaminants (e.g. dust) and large foreign objects (e.g. bolts) being introduced into the gearbox. In the worst case, foreign bodies can precipitate severe damages. For this reason, the area surrounding inspection covers must be cleaned, all bolts removed, and any objects kept on the inspector’s person must be tied down. Additionally, surfaces inside of the gearbox should only be cleaned using solvents that vaporize at room temperature, such as alcohol, to avoid contamination of the oil.
Although the inspection itself requires only 1-3 hours per unit, additional time is necessary to allow the unit to cool down, to permit the oil mist to dissipate, and to allow oil to drop off the gearing. The latter two points are important because the mist obstructs the inspector’s view and oil on surfaces can hide minor damages. Including the time to remove and replace the access covers, one should expect the gearbox to be offline for up to one shift.
Vibration measurement is a powerful tool for assessing a system’s performance and detecting damages which may not be visible during an inspection (e.g. an obstructed bearing). The basic setup is simple: accelerometers are affixed to the housing and generate a time-dependent signal. This time-dependent signal is then converted into a frequency-dependent signal using a Fast Fourier Transform (FFT). The resulting frequency spectrum allows the predominant vibration frequencies of the system to be easily identified.
Correctly interpreting the results requires more technical expertise, particularly when looking for damages. When a damaged part contacts another component, it causes a vibration and thus a periodic signal. The frequency of this signal depends upon the geometry and speed of the involved components. With sufficient knowledge of the system, it is possible to pinpoint the source of the problem and follow up appropriately.
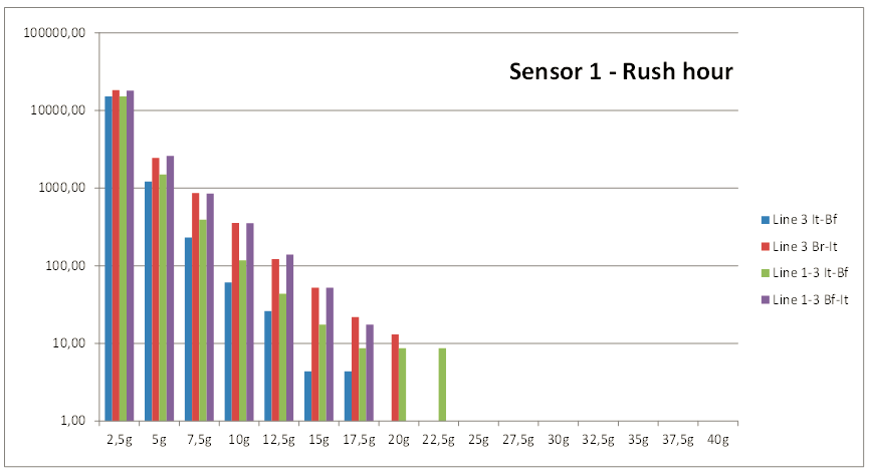
Beyond detecting failures, vibration measurement is useful for assessing the system’s overall performance. It is theoretically possible to identify trends but achieving the necessary highly repeatable reference conditions is very difficult in practice and many gearboxes operate on non-continuous duty cycles with varying speeds and torques. If these conditions are repeatable, performance can still be assessed by means of class counting (Figure 6). Here, certain frequency thresholds are defined and one then counts how often those are exceeded. Shock loads can often be significantly reduced by slightly modifying the process parameters. These changes will not noticeably impact the gearbox’s output but will increase its overall endurance.
Vibration measurement may be done on a permanent or a temporary basis. When permanently installed, the measurement is often incorporated into the system’s control scheme and can be used to trigger automatic shutdowns if the behavior changes significantly. Such systems are costly, however, and the ability to store data is limited. Performing these measurements on a temporary basis is significantly more affordable since the expensive equipment can be used on multiple gearboxes and there is no requirement for a sophisticated control system.
Oil sample analysis, inspection with endoscopy, and vibration measurement are all powerful and complementary methods for monitoring the condition of industrial gearboxes. Detecting damages early is essential for correcting them quickly and cost-effectively and for mitigating further damages.
In addition to sophisticated application engineering, this is the kind of after-sales-service that major bearing manufacturers offer their customers and what maintains their stable relationship. However, in collaboration with a competent engineering company, independent bearing distributors can achieve both a higher level of service and reduced costs and could therefore become extremely competitive in such applications.
Offering the after-sales-services as described, in addition to the bearing itself, will generate further profitable business and allow not only for offering a good product at an attractive price, but also solutions to any problems that might occur.